Best WordPress GDPR compliance plugin

GDPR WordPress plugin
WordPress is one of the most known and used CMS’s across the web, with plugins for everything you may need.
If you or your company run an online business and collect data from your customers, you probably have already heard about GDPR and the need for companies to comply with it. If not, you better start preparing because it came into force 25th may and the fines are no joke. Learn more about the GDPR.
Imagine if you manage several WordPress websites, and you need all of them to comply with the GDPR laws. It sounds hard and tiring, doesn’t it?
Now imagine another scenario where you go to one platform, that lets you create a general “Terms and Policies”, and scans the cookies on all your websites for you. Much better, isn’t it?
We’ll show you how you can do that with a WordPress plugin.
1 – Add the GetComplied plugin to WordPress
To add GetComplied’s plugin, you need to access your WordPress’s back office.
There access Plugins and Add New. Search for GetComplied, install it and Activate it.

2 – Create an account
Go to Create Free Account and register for free.

3 – Add your projects
Go to the projects section, then click on the new button.

Name your project. The project is now on your profile.
Now you are in the edit mode of the added project.

In the info section, you’ll have
- Company details
- Domain
- DPO and project info fields.
Attention: It’s very important that the domain is correct or else it may cause problems loading the GetComplied form on your website. So, make sure the domain (ex: www.example.com) is properly added.
In the settings section, you’ll choose:
- The Languages your website is translated to;
- The default language of your website;
- The URL of your logo (You can find it on your website by clicking on your company logo and select “Copy Image URL”, then paste it in GetComplied);
- The color in hex format (ex. #57BB82);
- And your email to notify you about new cookies on your website.
For now, let’s leave the project, click Save button and Close.
4 – Integrate the code
Now that you created everything you need to achieve GDPR compliance in WordPress, you can integrate the code you’ll find on the website, in your WordPress plugin.
Go back to GetComplied’s website. Your code will be on the project section.

Copy only the numbers after the “GC-“. In this example, we will only copy the “80204658” and insert it into the WordPress plugin.
Go into your WordPress Back office, go to Settings and then GetComplied. When you do that, a panel will appear, just paste the code you copied earlier and save changes.

5 – Create policies and add cookies
Cookies

To add cookies the process is similar to that of policies.
Click on new cookie and then:
- Name the cookie
- Setup if it’s a session cookie and its duration;
- Add the purpose of the cookie. For example “Functionality” for an Asp-Session cookie;
- If it’s a required cookie tick that option;
- Write a description for your cookie (For multiple languages, e.g.: you want to add French and English, so you chose French and edit in French, then chose English and edit in English);
- Save, publish and close.
If your website starts to use more cookies you’ll be notified by email.
Note: To be notified you need to fill the email textbox on Projects > Edit project > Settings.

Policies (Note: Policies are a premium feature)

You need to create some policies and terms to show your customers what they are agreeing on when giving consent.
If you are unsure of how to write strong “Terms and privacy” documents check this sample.
Click on the new policy button and then:
- Name your document;
- Choose the language you desire to edit in (note that when you want multiple languages you have to edit each of them separately);
- Choose if required or not for the user to accept your policies and terms to use your website;
- Save, publish and close.

6 – Policies, cookies, and Platforms
We have created cookies and policies. Now its time to add them to your project. We also have to add third-party platforms your website may use (ex: google analytics, Google Adwords). GetComplied has more than 400 to integrate.
Go back to projects and click Edit on the desired project.
Go to Policies. And click add.

Add all the policies you created earlier.
Then, the process is the same for that of cookies.
Click add and select the cookies you just created.

Now, let’s add the platforms your website uses. Go to platforms, click add and chose the ones you use.
The image below shows the analytics example.

Click on analytics, for example, to add third parties in case your website uses them. And you can save and close your project.
We’ve added everything to the project and now your website users (or other platforms) will know your policies and the cookies your WordPress website uses.
Congratulations! It seems like you’ve now achieved WordPress GDPR compliance with a plugin.
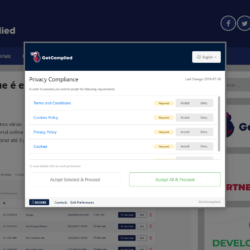
The GetComplied form must be appearing on your website.
Now that you’re done you can start collecting consent from users.
With this WordPress GDPR plugin, you can achieve compliance in a matter of minutes!
If you need help!
We have a youtube channel and other tutorials that might be useful.
If you still have any doubts, make sure you contact us either on social media or by email hello@getcomplied.com.
We also have a live chat you can use anytime with this icon on the bottom right corner:


